One easy way to get your data into the cloud, quickly and inexpensively (free actually!).
One of the best reasons to move your data to the cloud is the wealth of powerful tools and services available for all phases of the Data Science lifecycle. But many of those tools expect to read your data from internal sources, like Google Cloud Storage, BigQuery, or a streaming service like Cloud PubSub. So how do you get your data into the Cloud to begin with? I’m glad you asked, because that’s the question I’m going to answer in this article.
Introducing Cloud Storage Transfer Service
If you haven’t heard of this, it’s a simple service for automatically moving data into the Google Cloud. You can read more about it in the product documentation. Here’s where you’ll find this service in the Cloud Console:
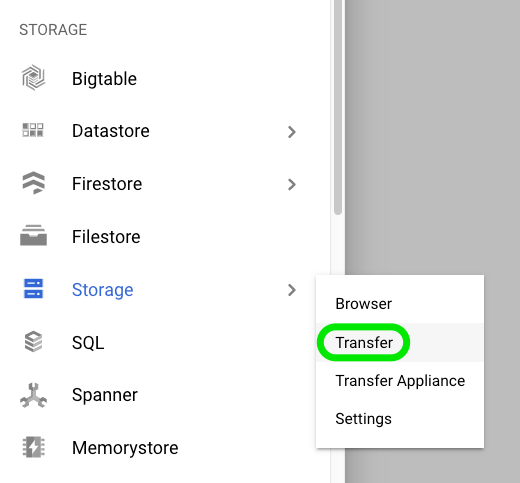
Let’s create a new transfer job:
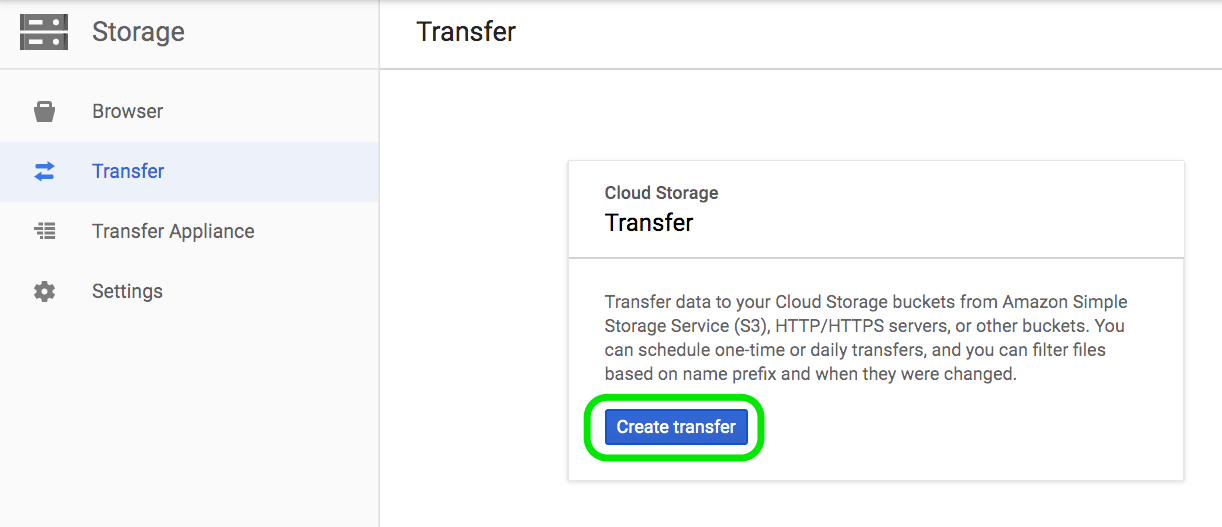
We’re prompted to enter three sets of specifications:
Select Source
This can be a GCS Bucket, an S3 bucket, or the web. Since our problem is importing data served on the web, we’ll go with the latter option. Note that when specifying the web as your source, there’s an extra level of indirection - you need to supply a URL that returns a file enumerating the URLs you want to fetch (a URL of URLs, if you will). Note the following rules regarding how the tab separated value file must be formatted:
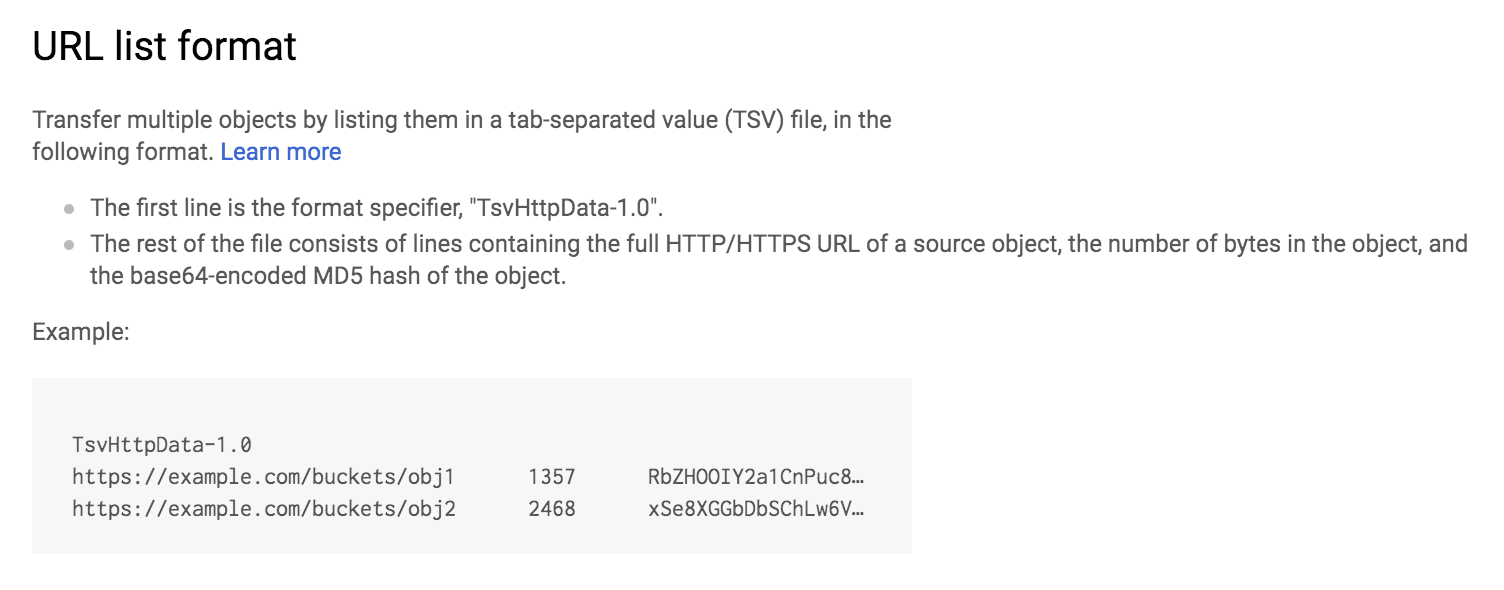
In practice, I’ve found the file size and checksums are not strictly required (though the header line is). Accordingly, I created a test file called xfer.tsv with the following contents:
TsvHttpData-1.0
https://dumps.wikimedia.org/other/pageviews/2019/2019-01/pageviews-20190101-000000.gz
https://dumps.wikimedia.org/other/pageviews/2019/2019-01/pageviews-20190101-010000.gz
https://dumps.wikimedia.org/other/pageviews/2019/2019-01/pageviews-20190101-020000.gz
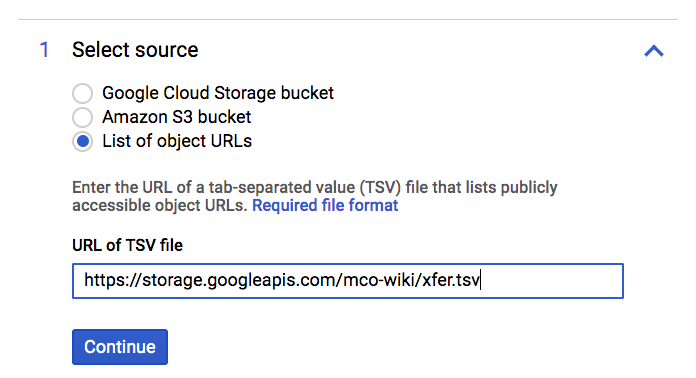
Using gsutil, I uploaded a copy of this file to a Cloud Storage object (gs://mco-wiki/xfer.tsv) and entered the full URL of this object (https://storage.googleapis.com/mco-wiki/xfer.tsvi) into the Select Source dialog.
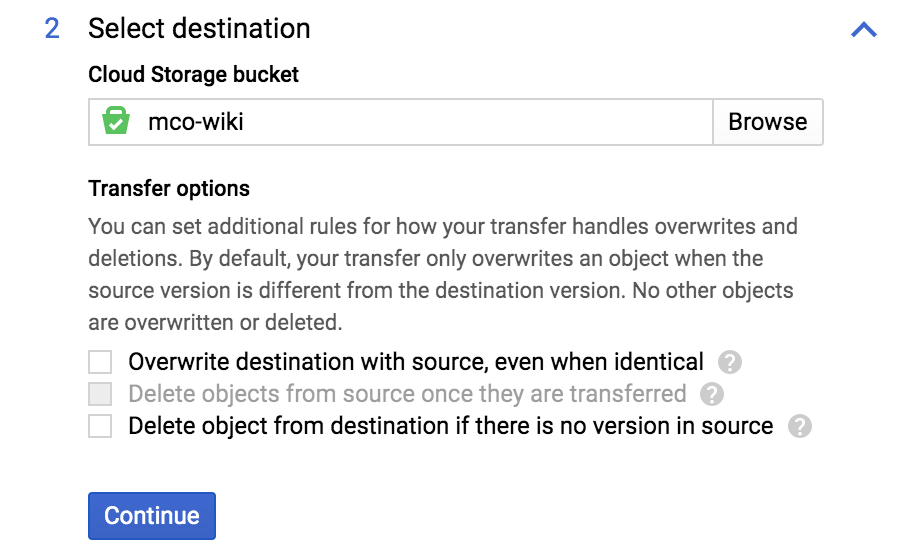
Select Destination
Next we select a destination. I’m having the data stored in a bucket named after my project: gs://mco-wiki.
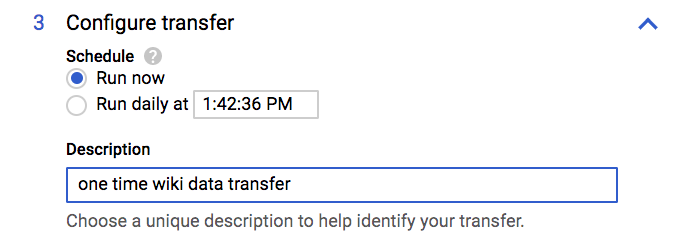
Configure Transfer
Finally, we specify whether this is a one-off request or a recurring request. For the former you can start the transfer running immediately. For the latter, you can schedule it to recur daily at a specific time of day.
Now we’ve finished giving our input so we can click the Create button to create our transfer request. If all goes well, we’ll then see our new job, it’s current status, and related attributes.

We can come back to this page to check on our job status. When it finished, we’ll either see error message(s) or a successful completion indication, in which case the imported data will be waiting for us in the destination bucket.
How much is this costing me?
Here’s the best part: ingress of data into Google Cloud Storage is always free, as is using the GCS Transfer service. So regardless of how much data you move to the cloud, it won’t cost you a cent.
Taking it to the next level
In this article we saw how to import large files, once or repeatedly, into Google Cloud Storage. But if the file is a big one, we’ll most likely be importing a compressed version and we’ll want to automatically decompress it, and load it into a data warehouse, like BigQuery, so that we can do some analysis, visualization, and reporting on this data. In other words, getting the data into the cloud is just the first step. In my next article, I’ll describe how I’m solving the more comprehensive problem of building an end to end process for loading, managing, and analyzing the Wikipedia data.
